 A la mesa · Manual
User manual
How to use A la mesa at your venue: what guests see, what floor and kitchen staff do, and how everything is set up in the back office.
Introduction
The three apps
- Guest app. Opens in the phone's browser when the table's QR code is scanned. Nothing to install. It shows the menu, takes orders and shows their status.
- Staff app. For waiters and the kitchen, on a tablet, phone or computer. It has the Floor, Kitchen, Menu and Cash register tabs.
- Back office. For whoever runs the venue or the brand: menu, tables and QR codes, map, staff, brand, reports and settings.
Roles
| Role | What they can do |
|---|---|
| Super admin | Uses the system area: creates, deletes and restores venues, creates brands and their admins, maintenance mode and backups. |
| Brand admin | Manages the brand's venues and the brand theme (colors, logo, font, domain). |
| Venue admin | Everything about their venue in the back office (tables, menu, map, staff, cash register, reports, settings), plus the floor and cash register in the staff app. |
| Waiter | The floor in the staff app: opening tables, taking orders, serving, charging and the cash register. |
| Kitchen | The kitchen queue and marking products as sold out. No cash register. |
An order from start to end
- The guest scans the table's QR code and orders from their phone.
- If the table is not open yet, the order is waiting for approval. The waiter opens the table and the waiting orders go to the kitchen. From then on, new orders go straight there.
- The kitchen accepts, prepares and marks each dish as ready at its station.
- The waiter serves the ready dishes. The guest follows the status under My orders.
- The guest asks for the bill, the waiter charges it and the table closes.
Guest app
Opening the menu
Every table has its printed QR code. Scanning it opens the venue's menu with the table already linked, ready to order.
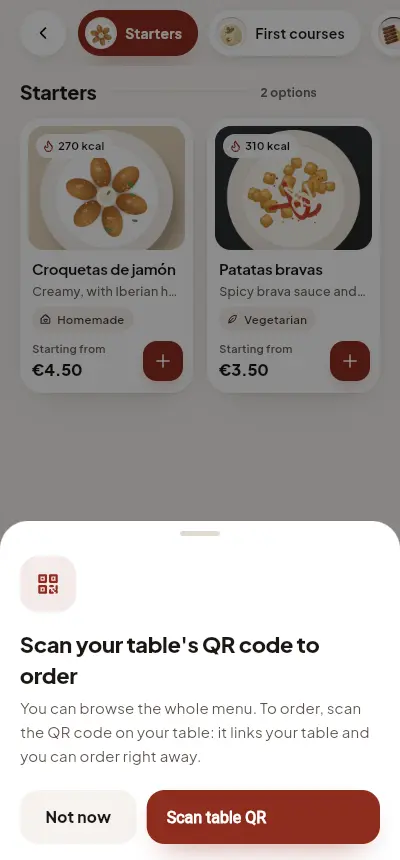
The menu can also be browsed without a table, for example from the menu QR code on the door or window. Guests can see the whole menu, but to order they tap Scan table QR and point at the code on their table. The table is linked without reloading the page. The browser camera only works over HTTPS; if it does not open, the phone's camera app can scan the code instead.
Browsing the menu
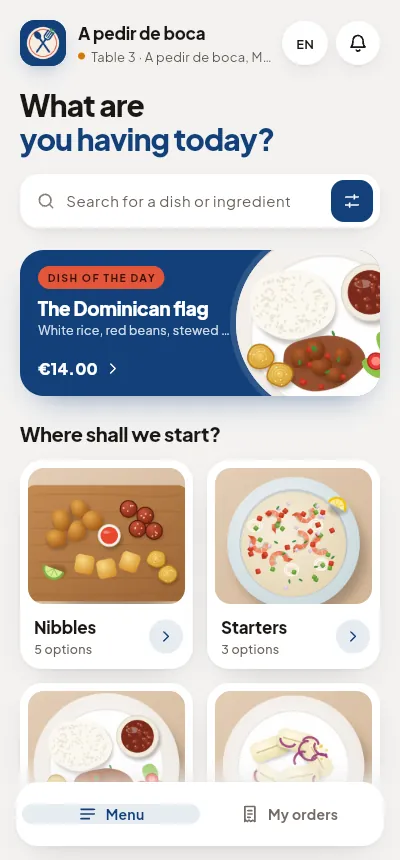
- The dish of the day comes first, then one card per section (starters, mains, desserts, drinks…), in the back office order.
- Opening a section lists its products; the other sections stay on top as pills to switch quickly.
- Drinks are split into Alcohol-free and With alcohol, with the alcohol content.
- Search finds dishes and ingredients in every section. Filter by diet and allergens hides what does not fit.
- Sold-out products show Sold out and cannot be ordered.
Product sheet
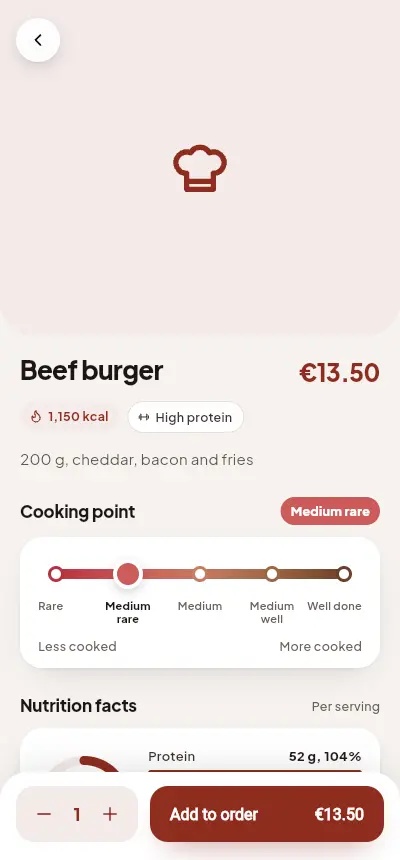
Tapping a product opens its sheet: photos, description, price, calories and macros, the 14 allergens and diet tags. Depending on the product, the guest also picks:
- Portion (tapa or plate, half or pint, glass or bottle), each with its own price.
- Choices: sauce, side, paid extras or ingredients to leave out. Some are required.
- Cooking point, from rare to well done, medium by default.
- Notes for the kitchen, as free text.
Ordering
- Add products with + or from the sheet with Add to order.
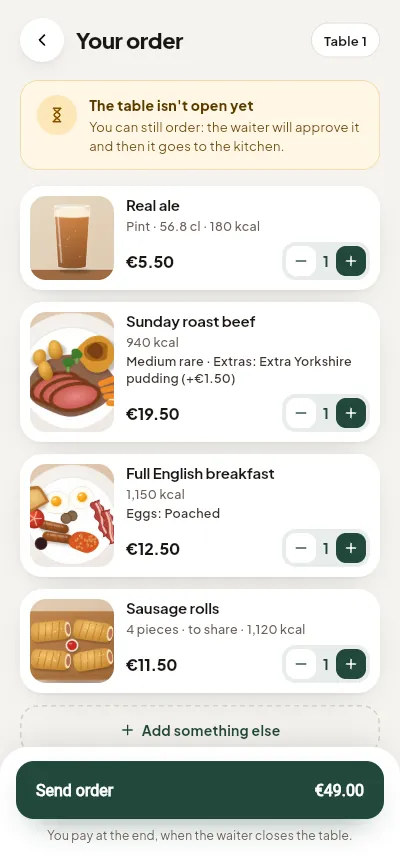
- Tap View order to check quantities, total and nutrients.
- Tap Send order. Guests pay at the end, when the waiter closes the table.
If the table is not open, the order is still sent but waits for the waiter to approve it. It does not reach the kitchen until then.
My orders
The My orders tab shows each order with its status: received, preparing, ready and served. It also shows the waiter attending the table and the table's bill.
If the venue serves by courses, Your table's courses shows which dishes wait for the waiter to fire their course (for example, the mains).
If the waiter moves the bill to another table, the guest sees a notice and scans the new table's QR code to carry on.
Calling the waiter and asking for the bill
- Call the waiter: staff get a notice with the table number. It can be cancelled while nobody has attended it.
- Ask for the bill: the guest picks card or cash and a waiter brings it.
Each table can have one open call and one open bill request, and there is a limit on repeated notices to prevent abuse.
Cancelling an order or a dish
From My orders guests can cancel a whole order or a single dish. Whatever the kitchen has not started is cancelled right away. If it is already being prepared, the button reads Ask to cancel and the staff decide.
Rating the visit
After paying, guests can rate service, food and ambience from 1 to 5 and leave a comment. Reviews show up in the back office under Reviews.
Staff app
Signing in
Each person signs in with their email and password. Staff who work at several venues pick one (and can change it later with Switch venue).
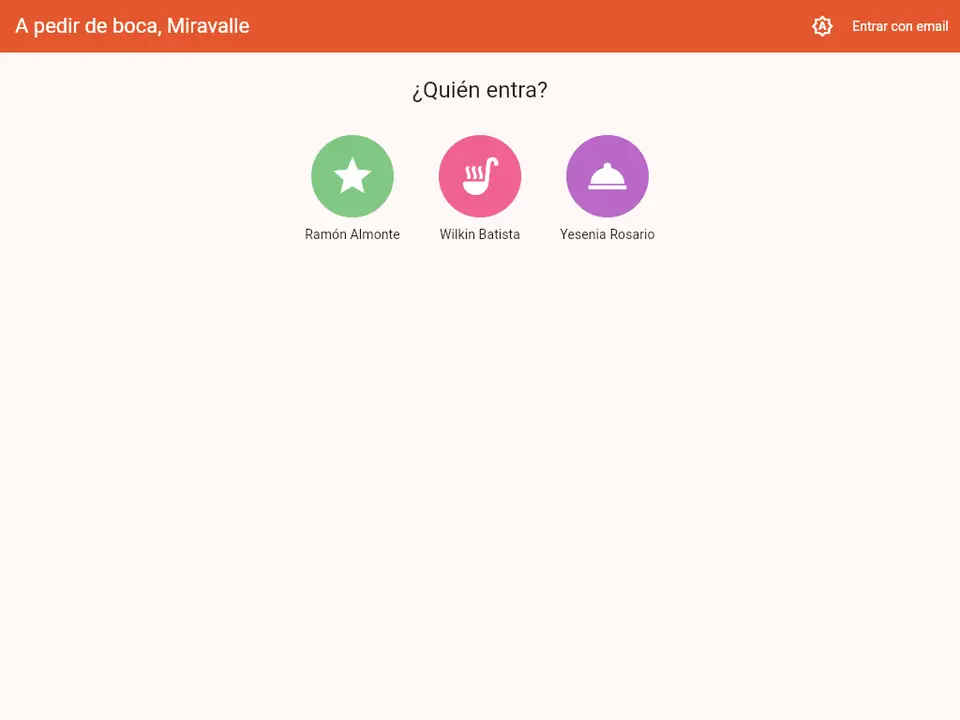
Shared device. On a tablet or till the whole team uses, a venue admin taps the tablet icon and picks Use as shared device. From then on, the sign-in screen shows the venue's staff with their photo or icon: each person taps theirs and types their 4 to 6 digit PIN. After 5 wrong PINs the user is locked for 15 minutes. Photos, PINs and devices are managed in the back office, under Staff.
Floor
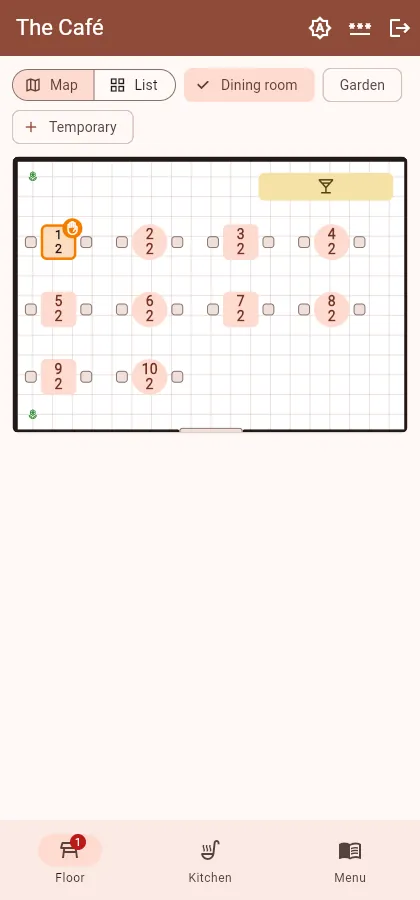
The app opens on the floor map. Each table shows its state: free, open, orders awaiting validation, dishes to serve, calling the waiter or wanting the bill. You can switch between Map and List, and show only My tables.
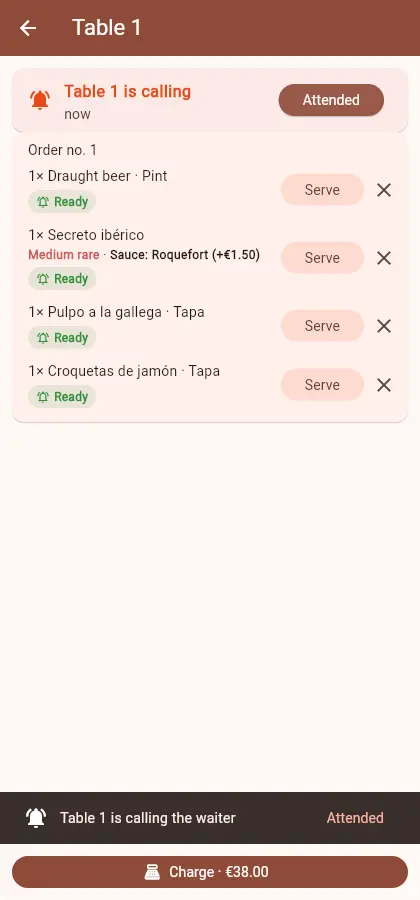
- Waiter calls and bill requests appear on top and as a notice over any screen. They are closed with Attended.
- Temporary adds a table or chair for this sitting only. It leaves the map when the bill is paid.
A table
- Opening the table validates waiting orders and sends them to the kitchen. You set how many guests there are.
- Add order lets the waiter order for the table, with choices and notes.
- Serve marks a ready dish as served.
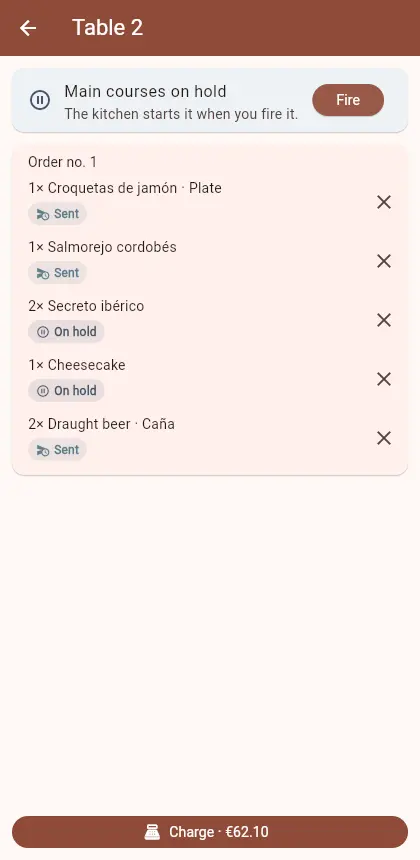
- Courses: drinks and the first course go with the order; the rest wait until the waiter taps Fire.
- The waiter attending the table can be changed from the table itself.
- The table's QR code can be shown on screen for guests to scan.
Charging
- The charge button shows the total. Pick cash or card and, if any, the tip.
- Bills can be paid in parts or split by a number of guests; the bill shows what is paid and what is left.
- Discount takes a percentage or an amount with a reason. On the house leaves a dish uncharged.
- Print bill sends it to the venue's ticket printer, if one is set up.
- Once everything is paid the table closes. If there is nothing to charge, Close table closes it without a payment.
Corrections
- Cancel a line or a whole order. If the kitchen already has it, give a reason. Cancelled items are not charged.
- Edit a line the kitchen does not have yet, undo a line's last step or restore it.
- Answer the guest's cancellation requests: cancel it or keep it.
- Move the whole bill or some orders to another table. If that table is occupied, the bills are joined; this cannot be undone.
Kitchen
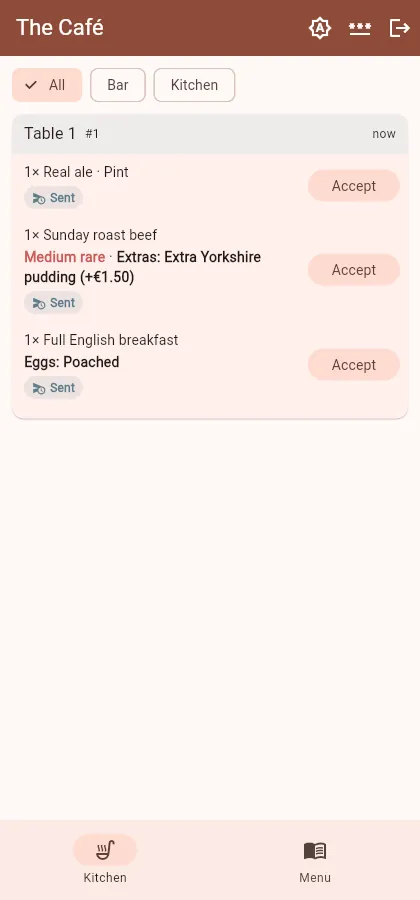
The Kitchen tab lists validated orders, oldest first, with choices, cooking point and notes. It can be filtered by station. Each dish goes through Accept, Prepare and Ready; once ready, the floor sees it to serve. Dishes from a course not fired yet show as on hold.
Marking products as sold out
In the Menu tab, mark a product, or just one of its portions, as sold out or available. Guests' menus update right away.
Cash register
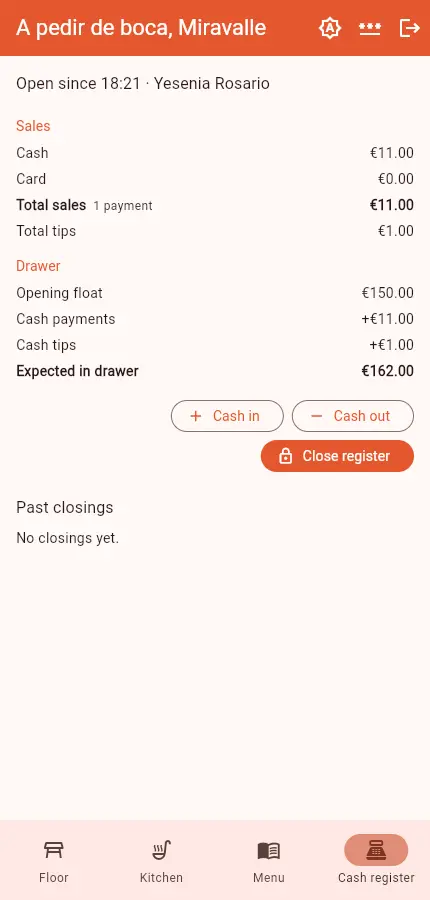
The Cash register tab (waiters and admins, not the kitchen) shows a red dot while the register is closed.
- Open the register with the opening float.
- During the shift, record cash in and out with a reason.
- Close the register with the counted cash. The app shows the expected amount (float + cash payments + cash tips + cash in − cash out) and the difference.
Past closings are listed below. If the venue has a cash drawer, it opens when the register opens or cash moves, and also with Open cash drawer.
Back office
Sign in with email and password. The super admin lands in the system area. Everyone else goes straight to their venue, or picks one if they have several. Each venue has these sections: Tables, Map, Menu, Stations, Reports, Cash register, Reviews, Staff, Brand, Activity and Settings.
System area
- Venues: create, search, delete and restore venues. A deleted venue's staff lose access and its QR codes stop opening the menu, but its history is kept.
- Brands: create brands and their admins.
- Activity: the change log of the whole platform.
- System: maintenance mode (guests and staff see a notice with your message) and backups of the database and photos, with frequency and retention days.
Tables and QR codes
- Add tables comma-separated, ranges allowed:
1-10, Bar, T1-T4. - Rename, deactivate or activate a table. A deactivated table does not open the menu.
- Print QR codes as a PDF, six per page, with the logo in the middle and the table name below. A single code can be printed too.
- Rotate QR code invalidates a table's printed code and creates a new one. Print it and replace it on the table.
- Menu QR code: opens the menu without a table, for the door, window or bar.
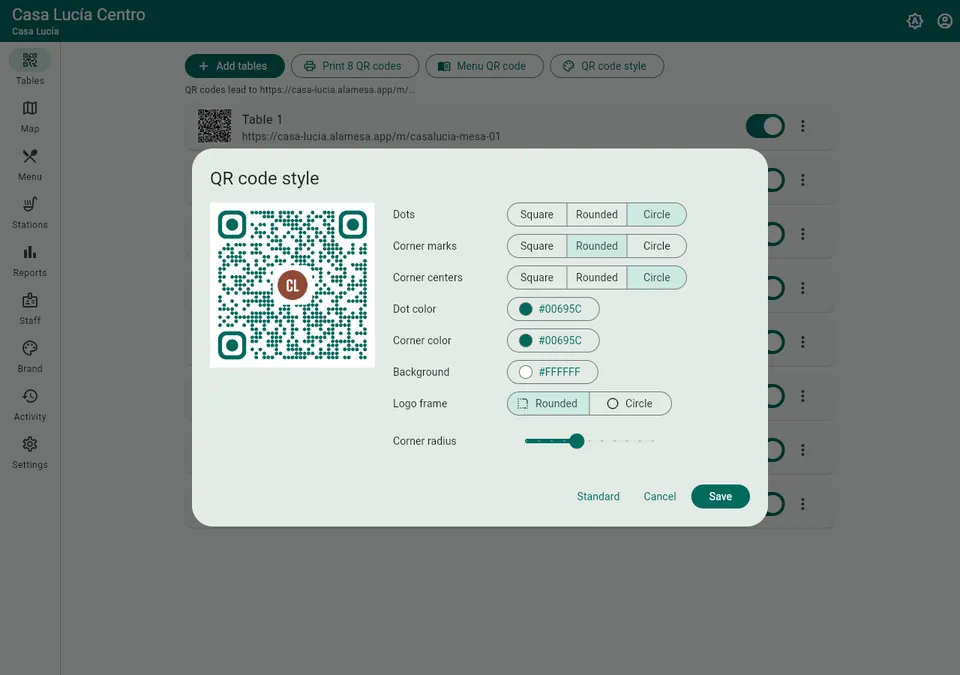
- QR code style: dot and corner shapes, colors, background and logo frame. It warns when contrast is low.
- Default waiter per table: bills opened there go to them.
Map
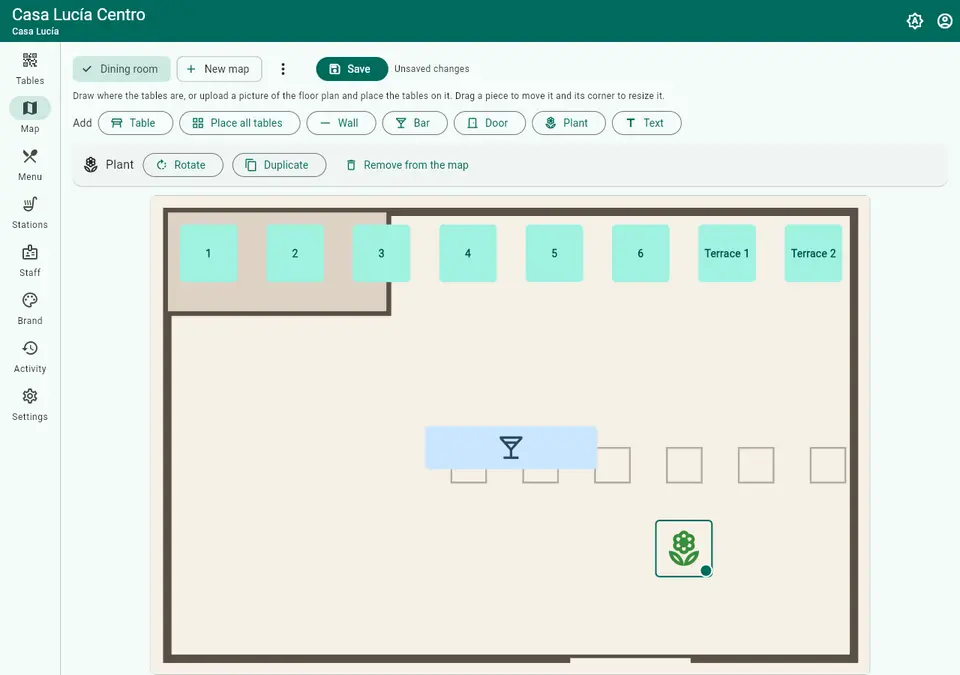
Draw the room or upload a floor plan picture and place the tables on it. A venue can have several maps (dining room, terrace…). Pieces are tables (square or round, with their chairs), walls, bar, doors, plants and text. Select several with Shift or Ctrl and click, or by dragging, and undo with Ctrl+Z.
- Place all tables adds the ones not on a map yet.
- Bar stools can be tables with their own QR code and bill.
- A chair can have its own bill, go on a table's bill or be drawn only.
- The Live view shows which tables are open, who attends them and which requests are pending.
The saved map is the one the floor uses in the staff app.
Menu
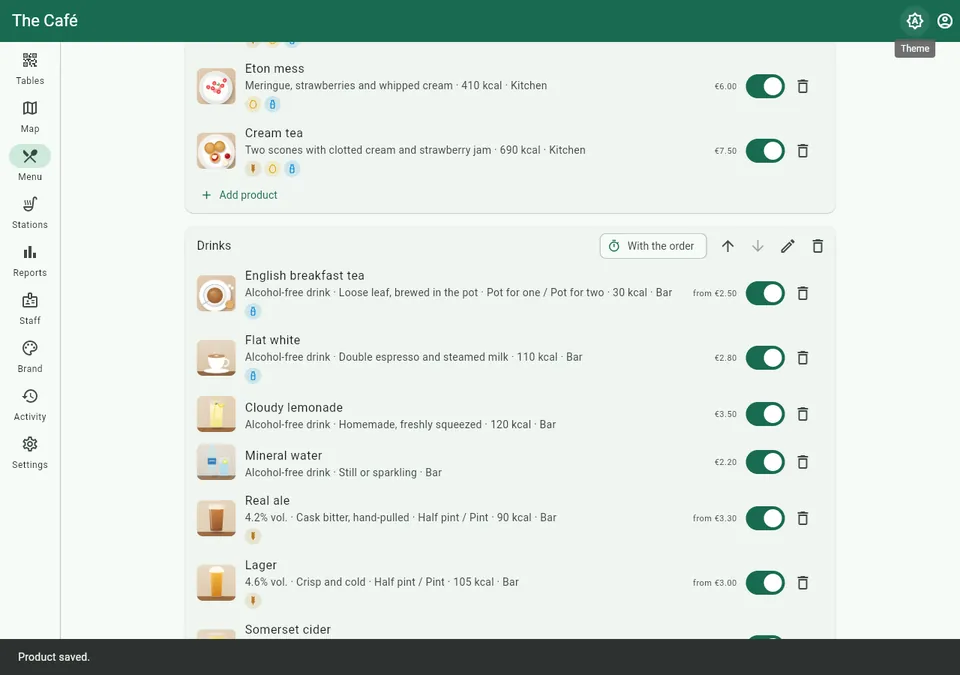
- Categories: create, rename, reorder and delete (only when empty). Their order is the guest menu's order.
- Product: name, description, price, the station where it is prepared and category.
- Photos: JPEG, PNG or WebP up to 5 MB; the first one is the cover.
- Allergens (the 14 required ones, traces included), nutrition per serving and diet tags guests can filter by.
- Portions: for example tapa and plate, each with its own price, nutrition and availability.
- Beverage: alcohol-free or alcoholic, with its alcohol content.
- Dish of the day: shown first when guests open the menu.
- Choices: groups of one or several options, required or not, with paid extras.
- Ask for the cooking point.
- Service course: drinks and the first course go with the order; the waiter fires the rest.
- Sold out and Remove from menu (past orders do not change).
Translations. Settings sets the language the menu is written in. The editor has a tab per language (English, Spanish, French and Italian) to translate names, descriptions, portions, choices and categories. Blank fields show the original text. Each guest sees the menu in their app's language.
Stations
Each product is prepared at a station (kitchen, bar, desserts, grill…) and shows up on its kitchen screen. A new venue comes with the “Kitchen” station.
Reports and reviews
- Reports: sales between two dates, day by day (bills, guests, cash, card, discounts, tips, total) and by product (units, on the house, revenue). Download them as CSV.
- Reviews: guest ratings, with averages and a breakdown by waiter.
Cash register
Venue admins get the same cash register screen as in the staff app, with past closings and a refresh button.
Staff
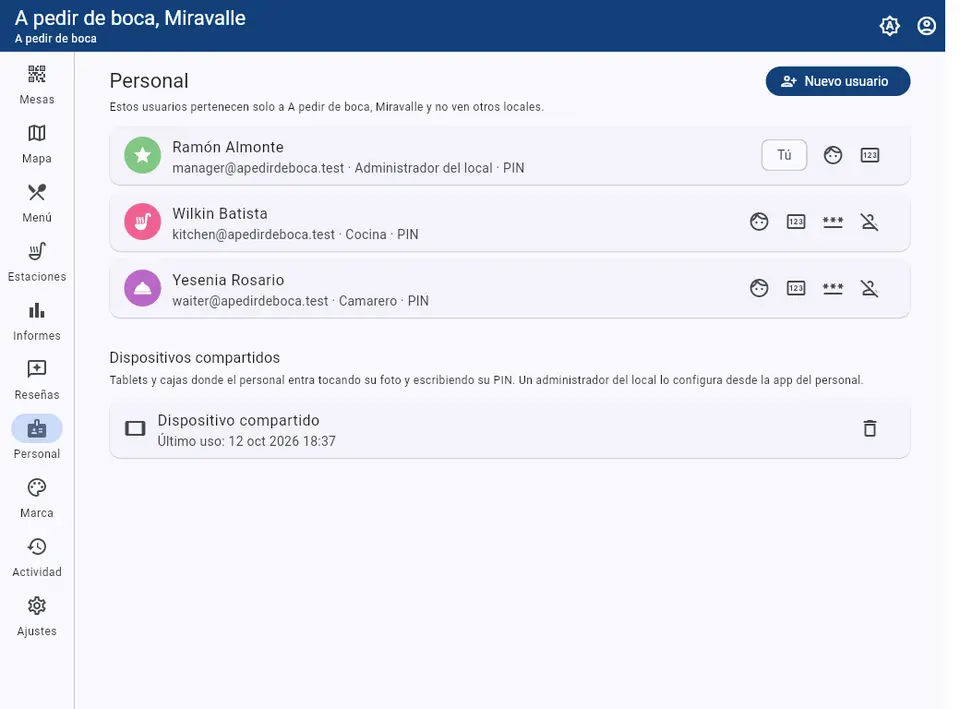
- Create venue users as venue admin, kitchen or waiter, with an initial password. They only see this venue.
- Set someone's password or deactivate them (they can no longer sign in, but their history is kept).
- Photo or icon and PIN to sign in on shared devices.
- Shared devices: the tablets and tills with PIN sign-in. Removing one stops PIN sign-in there.
Brand
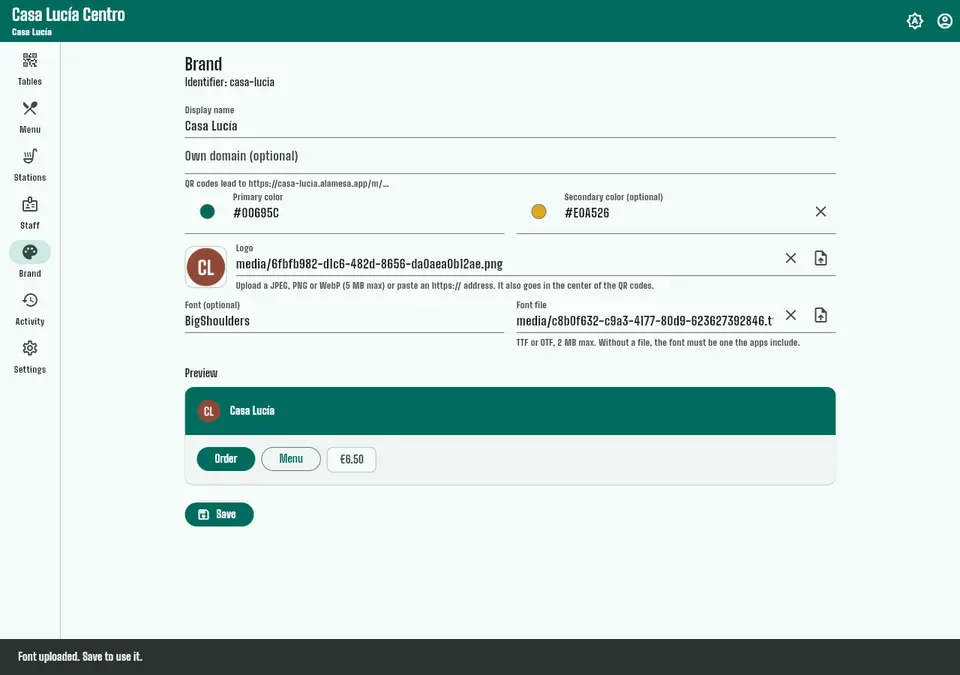
Display name, own domain, primary and secondary colors (applied exactly as chosen in the apps), logo and font (TTF or OTF). The preview shows the result. All venues of the brand share the theme. If you change the domain, QR codes already printed still point to the old one: reprint them.
Activity
Every change is recorded with who did it, when and from which IP address. Entries cannot be edited or deleted.
Settings
Venue name, link identifier, time zone, currency, menu language, tax included in prices, receipt header (legal name, tax id and address) and the ticket printer's IP address. You can also change your own password here.
Language and theme
All three apps come in English, Spanish, French and Italian. They all have light, dark or system mode (the default). On the web each screen has its own address, so the browser's back button works and links can be saved.
What's new
- October 2026
- Staff quick sign-in with photo or icon and PIN on shared devices.
- Opening and closing the cash register in the staff app and the back office.
- Floor map with table states, translatable menu, menu without a table with QR scanner, exact brand colors, dark mode.